Showing posts with label Gardening. Show all posts

Thursday, March 24, 2011

Ready, Set, Garden!

It's almost time!

I think we're going to wait two or three more weeks, and then our garden is going to get planted!

This is our first year to have a backyard garden. Some days I think we're a little too ambitious for first-timers; other days I wonder if we're planting enough.

My husband is going to build raised beds, three of them, eight feet long by four feet wide. In case your math skills are a bit lacking today {as mine usually are}, that's a total of 96 square feet of gardening space!

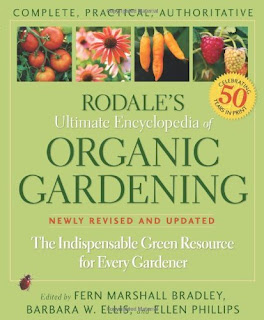
To help amateurs like us, I heartily recommend Rodale's Ultimate Encyclopedia of Organic Gardening


This thick resource is a treasure of information. So far, I've read about everything from composting to companion planting, from basil to eggplant to parsley, from helpful insects to destructive insects, from raised beds to cottage gardening and everything in between. This book really is "the indispensable resource for every gardener"!

This year we've decided to plant squash, zucchini, jalepenos, eggplant, watermelon, pumpkin, spearmint, peppermint, flat-leaf parsley, basil, rosemary, cilantro, strawberries, and a few more I can't recall at the moment. To help with natural pest control, we're going to plant some African and French marigolds.

Our hot compost pile has been going for about three weeks now. It's been a bit of a challenge to find the {right} mix of carbon and nitrogen, and we're still not quite there. There have been a few times when my hubby has to hold his nose when he turns the barrel. So we add more dead leaves and dirt. I just hope the learning curve is generous!

So I have some questions for all you gardeners out there...from amateurs to master gardeners...
  • What are you planting this year?
  • What are you doing right now to prepare for the growing season?
  • What are your favorite companion planting combos?
  • Any advice you can share with the rest of us?
HAPPY GARDENING, PENNY-WISE WOMEN!

Written and submitted by Lindsey @ Penny-wise

Sunday, February 27, 2011

DIY: Compost Bin & Rain Barrel

It's almost that time of year...time to start seriously thinking about readying our soil for gardening, time to start planning our beds, time to start preparing for a beautiful summer of growing our own produce! We are planting our first vegetable garden in our backyard this year. My husband has already planned out the raised beds, and all we are waiting on is a nice, less windy weekend to get them built. We have our seed source ready, although we are waiting just a bit longer to order seeds. And we have located an organic farmer in our area who is more than willing to share his secrets and his soil with us. 


One thing we've been stumped on is compost. I had in my mind this dreamy compost pile. I scoured the internet for the kind of compost barrel that has its own platform and handle to easily stir the compost. Well, those unfortunately, cost anywhere from $250-$800! Not in the budget this year!


That's why I was relieved when we received this e-mail from Amanda:


I am an avid gardner and have just "discovered" some inexpensive ways to have the garden I have always wanted.
 
I recently made my own rain barrel and compost bin out of inexpensive trash cans. I have always wanted one of those nice compost bins where you add your materials and out comes beautiful compost, but they are so expensive and I thought I would never have one. While looking at some other gardening products, it struck me that surely I could make a composting bin myself for much less. I found a few videos demonsrating how to make a bin out of a trash can that cost around $20-$30. 

Simply drill some holes for air to circulate on the sides, top, and bottom. That's it! Add your kitchen scraps, old plants, and other materials to compost. Once a week, lay the bin on its side and roll around to turn the pile. In a few weeks you will have compost for your garden at the fraction of the cost of purchasing it or buying a premade compost bin. 
 
The same applies to a rain barrel. Why pay $150 for a rain barrel when for $20-$30 you can make one out of  a trash can? I simply set a trash can on some bricks and inserted a spigot near the bottom to attach a hose to or fill up my watering can. 
 
I hope this can help some others who love gardening but don't have the finances to get the fun stuff to help make gardening easier. 

Amanda, thank you for these useful and penny-wise tips! 

Written by Lindsey @ Penny-wise, Submitted by Amanda

Wednesday, February 16, 2011

Hummingbird Feeder Solution

This week has been a beautiful change of scenery and temperatures from last week's Blizzard-fest 2011. We have been out-of-doors everyday this week, playing basketball, going to the park, walking, and cleaning up a little around the outside of the house. 

I couldn't think of a better time to post this recipe for a little snack for our friends, the hummingbirds. I know winter won't be over for another month, but this just makes me giddy for the spring that's right around the corner. Unfortunately, we don't get many hummingbirds here in West Texas, but I'll try this solution anyway and hope for the best!

Here's how it's done:
 
Dissolve 1 part granulated sugar in 4 parts boiling water. Cool. Refrigerate until needed. Red food coloring is not necessary.

*Note from Linda at Penny-wise Women: I use this recipe myself in my feeders and never use food coloring. It works great, and we always have loads of hummingbirds...so neat to watch. I also highly recommend a DVD called First Flight: A Mother Hummingbird's Story. It is a nature documentary by Noriko and Don Carroll based on their book of the same name and published by Andrews McMeel. I highly recommend the hummingbird solution, the documentary, and the book to all you nature lovers.

Written by Lindsey & Linda at Penny-wise. Submitted by Gaeleen.

Monday, February 14, 2011

Spider Control


Does the ingredient list on your can of spider spray remind you of a horror movie? Ingredients you can't spell or pronounce, chemicals that could possibly wreak havoc on your mind or body--all included in that can of Raid you've got in your garage. And, if you have a chemical-sensitive or autistic child, forget about pest control of any sort. Those chemicals can cause numerous reactions in their little bodies.


Our friend Gaeleen has come to the rescue again with yet another all-natural pest control option:


Soak 1 package chewing or pipe tobacco in 1 gallon boiling water untilcool or overnight.  Strain into container.  Combine 1 cup tobaccojuice with 1/2 cup lemon dish soap.  Pour in spray bottle.  Spray downcorners and dark places.


No scary ingredients. No harmful chemical smells. Just inexpensive, all-natural spider control.


Submitted by Gaeleen

Tuesday, January 11, 2011

Make Your Own Seed Pots

There is a gadget you can purchase that helps you make plant pots out of newspaper which can be planted in the ground, as they are biodegradable. If you're in a really frugal mood, however, make them yourself. Here is the method I (Linda) use, taught to me by a nurseryman in the United Kingdom; and it works extremely well. It just takes a little practice. You will need a cardboard toilet roll or old jars (baby food jars work well) and newspaper.
Cut an old newspaper down the center crease so you have two halves.
Fold one sheet in half lengthwise and run a ruler down the crease. The fold is important because it will be the top of the pot.
Roll your folded sheet tightly around the tube. Try to be neat and leave about 1 cm of tube exposed at the fold end of the paper so that you can remove it later. Crunch and twist up the end of the paper that hangs off the other end and push it up into the tube. 
Pull the cardboard roll out, and voila! you have a free newspaper seed planter.
You can vary the size of the pot by using various sizes of glass jars and even store bought plant pots. 
Once the pots are complete, fill with soil, plant your seed, and stand on a tray so that you can water your seeds. Don’t forget to label what you planted.
Written by Linda @ Penny-wise
Here's a recommended site from our friend Gail:
The cost to get started using this site is around $16.00.
Submitted by Gail

Wednesday, December 8, 2010

Penny-wise Pest Control

Here's our first gardening post! Although it's winter, this pest killer will come in handy at the beginning of the gardening season in just a few months.

Have aphids, whiteflies, or caterpillars? 

Then here are a couple of sprays you might find helpful:


  1. Soak 2 cups chopped rhubarb or tomato leaves in 2 two cups of water overnight. Strain to remove solids. Add 2 more cups of water, transfer to a spray bottle, and spray on plants. **Avoid skin contact.**
          --OR--

    2.  Combine 1 oz. Murphy's Oil Soal with 1 gallon of water. Transfer to a              spray bottle and mist on plants.

Both options are not only less expensive than regular bug sprays, but they're much better for the environment!

Submitted by Gaeleen