Wednesday, March 30, 2011

A Co-op Worth Checking Out

I have to be honest. The first time I ever heard of a "food co-op" was when our friend Rachel sent us information on several food co-ops. In my mind, there were two co-ops in the United States: Sam's and Costco...neither of which appealed to our family much.

And, unfortunately, I live in an area of the country that just isn't in to the whole local/organic/natural/eat-what's-good-for-you craze yet. There are thousands of acres of GMO cornfields and cotton fields, millions of corn-fed cattle on feedlots, and commercial meat processing plants everywhere.

When I heard about Azure Standard, I was quite impressed. I spent several hours browsing their extensive lists of all-natural and organic products. Then I spent a few more hours comparing prices to my local health food store. I was pleased and surprised. Azure Standard's prices beat my local store's prices on many items.

So, my husband and I thought we'd give it a try. Thankfully, Azure just started delivering to our town. We stayed up late one night to "shop" from the comfort of our bedroom. Our first order cost us a little over $100, and we got SO MUCH food!

Carrots, apples, lemons, raw milk cheese, canned pizza sauce, frozen green beans, sprouted grain tortillas...Azure's selection is very broad. They carry non-food items, books, canning supplies, heirloom seeds and organic seedlings. You'll find dairy and non-dairy milks, cheese, yogurts, and ice creams. Deodorant, toothpaste, face moisturizer, feminine hygiene items, and hand soap are also offered.

One of the things I was most excited about was their selection of bulk grains, beans, and rice. They even offer 5-gallon buckets with gamma seals to store those grains and beans in.

Their site is very easy to navigate. Before placing my first order, I spoke with a very friendly and helpful customer service representative.

As much as I enjoy the luxury of this co-op, I am writing a review and must be honest. While many of their prices were less than those of my local store, some aren't. For example, I can get brown sugar for about $2.00 cheaper in the bulk aisle of my local store than through Azure Standard. Just this evening, I was completing my April order and was curious about the flax seed meal. Azure's price seemed fair, but I called my local store, just to check. The local store was about $.65 less. Same with shredded coconut and sesame seeds.

Just a word of advice: either know your local prices before you start shopping with Azure, or call your local stores while you're shopping to compare. That way you can be sure you're getting the best price possible.

It's also very important to know that Azure's delivery rounds are once per month. You MUST have your order in by the order cut-off date to receive your products in that month's delivery. Depending on where you live, the cut-off dates are different. You will have to contact Azure personally to determine your cut-off date, delivery date, and drop point.

So what I am ordering this month???

  • All of our garden seedlings! And they're certified organic. Right now, I have eggplant, squash, zucchini, watermelon, pumpkin, strawberries, rosemary, mint, parsley, basil and a few other plants in my cart.
  • In-season, organic apples for a fabulous price: 3 lbs. for $1.90.
  • Milo for milling.
  • Potato starch and baking powder.
  • Canning jars and lids.
I can recommend, without reservation, Azure Standard to you. I have personally ordered from this co-op. All my items have, thus far, been in good condition upon arrival. The delivery was on time, and I even enjoyed meeting members of my community at the pick-up.

Written and submitted by Lindsey @ Penny-wise

*This review was written independently. This website is not receiving any compensation for reviews given, whether positive or negative.

Monday, March 28, 2011

A Meal of Limitless Combinations

Sweet potatoes and greens...not a commonplace combination. The ways you can vary this meal are endless. Plus, it's easy, inexpensive, and very healthy!

Ingredients:

Sweet potatoes
Other potatoes (Russet, red, Yukon gold, whatever you like)
Onions or shallots, if your family enjoys them
Salt and pepper
Rosemary, dill, Parmesan...whatever you like
Salad greens (different lettuces, spinach, kale, whatever you enjoy in your salad), washed and dried

Preheat oven to 375. Cut all potatoes into bite-size pieces and stir together with enough oil to coat. Add salt and pepper, herbs, cheese, whatever you're going to use Roast until potatoes are brownish for about 45 minutes, turning half-way through cooking. When the potatoes are done, spoon them over your green salad.

For a large family, you may want to do two large pans of potatoes: one sweet, the other pan with the other potatoes. A smaller family can get away with half a pan of each type of potato.

You can also substitute potatoes with pumpkin, zucchini, or other squashes. We also enjoy trying different dressings like Italian, vinaigrette, or even hot sauce. The variations are endless!

This meal is the perfect combination of hot and cold, soft and crunchy, sweet and savory!

Submitted by Heather @ Penny-wise

Thursday, March 24, 2011

Ready, Set, Garden!

It's almost time!

I think we're going to wait two or three more weeks, and then our garden is going to get planted!

This is our first year to have a backyard garden. Some days I think we're a little too ambitious for first-timers; other days I wonder if we're planting enough.

My husband is going to build raised beds, three of them, eight feet long by four feet wide. In case your math skills are a bit lacking today {as mine usually are}, that's a total of 96 square feet of gardening space!

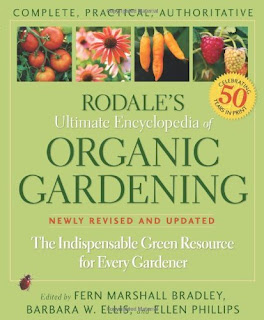
To help amateurs like us, I heartily recommend Rodale's Ultimate Encyclopedia of Organic Gardening


This thick resource is a treasure of information. So far, I've read about everything from composting to companion planting, from basil to eggplant to parsley, from helpful insects to destructive insects, from raised beds to cottage gardening and everything in between. This book really is "the indispensable resource for every gardener"!

This year we've decided to plant squash, zucchini, jalepenos, eggplant, watermelon, pumpkin, spearmint, peppermint, flat-leaf parsley, basil, rosemary, cilantro, strawberries, and a few more I can't recall at the moment. To help with natural pest control, we're going to plant some African and French marigolds.

Our hot compost pile has been going for about three weeks now. It's been a bit of a challenge to find the {right} mix of carbon and nitrogen, and we're still not quite there. There have been a few times when my hubby has to hold his nose when he turns the barrel. So we add more dead leaves and dirt. I just hope the learning curve is generous!

So I have some questions for all you gardeners out there...from amateurs to master gardeners...
  • What are you planting this year?
  • What are you doing right now to prepare for the growing season?
  • What are your favorite companion planting combos?
  • Any advice you can share with the rest of us?
HAPPY GARDENING, PENNY-WISE WOMEN!

Written and submitted by Lindsey @ Penny-wise

Instant Oatmeal {Part 2}

Here's another make-your-own oatmeal recipe from our friend Gaeleen. She says this one is great for camping {or just for those days when you want something quick and easy}.

Ingredients:
3 cups quick oats or fresh rolled
salt (not necessary, but you can add it if you like)

Put 1/2 cup oats in blender and blend at high speed until powdery. Reserve in a small bowl, then process another 1/2 cup oats. Into each bag, put 1/4 cup unchopped oats, 2 Tbsp. powdered oats and 1/4 tsp salt. Seal and store packets in an airtight container.

To serve: Empty packet in bowl and add 3/4 cups boiling water. Stir and let stand 2 minutes.

Flavor options:

Apples & Cinnamon: To each bag add 1 Tbsp. sugar, 1/4 tsp. cinnamon and
2 Tbsp. chopped dried apples.

Cinnamon Spice: To each bag add 1 Tbsp. sugar, 1/4 tsp. cinnamon and
1/8 tsp. nutmeg.

Raisins & Brown Sugar: To each bag add 1 Tbsp. brown sugar and 1 Tbsp. raisins

Fruit & Cream: Powdered milk or coffee creamer with dried fruit in the bags.

Submitted by Gaeleen

Monday, March 21, 2011

Make Your Own Hamburger Buns

This recipe is from Heather's friend Cherie. Heather says, "I shape the buns by hand. Just pinch off a golf ball-size to racquetball-size and stretch and pull it until it looks like a flat bun. You can also use this recipe for hot dog buns."

Ingredients:

4-5 cups flour (white, wheat, or a combo of both)
2 Tbsp. yeast
1 cup milk
3/4 cup water
1/2 cup oil
3 Tbsp. honey
1 tsp. salt

Mix 2 cups flour with yeast. Heat milk, water, oil, honey and salt on the stove until very warm. Pour liquid mixture into the flour and beat well. Start adding the rest of the flour until dough is soft. Knead briefly, then let set for 10 minutes.

Next, roll out dough to 1/2 inch thick and cut out buns (or use Heather's method above). You can use the mouth of a large drinking glass or a biscuit cutter too. Let the buns rise for half an hour on a greased baking sheet. Bake at 400 degrees for 12-15 minutes.

Submitted by Heather @ Penny-wise and Cherie

Tuesday, March 15, 2011

The Many Uses of Orange Peels

Our family recently purchased a juicer. We have truly enjoyed it and all the health benefits that go along with fresh, raw, untouched juice. It's like milk from the cow...there's really nothing like it.

Obviously, our produce bill has gone up a bit. I decided if juicing was something we were going to do long-term, I was going to utilize every bit of the fruit and veggies, not just the juice. 

For the most part, we're composting the pulp that our juicer spits out. Though I haven't tried it, I would like to add that pulp to our muffins and quick breads for some extra fiber and bulk. 

We made some freshly squeezed orange juice the other day, and it was phenomenal! Then I looked at my cutting board and saw the pile of orange peels. I immediately thought, "I can't throw all that away. Surely there's something I can do with the peels of five oranges that's better than composting."

Turns out, I was right. Orange peels have TONS of uses.

Did you know that you can use an orange peel and a bit of coarse sea salt to scrub coffee rings out of your coffee mugs? You can also run a few orange peels through your garbage disposal to freshen it up. And, you can make your own dried orange peel to use in recipes, which is what I did.


I just used my handy micro-plane grater and went to town. A zester or fine cheese grater would work too, if you don't have a micro-plane grater.


Once you've gotten all the orange peel off you want, leave it out to dry on your counter top for about 24 hours. Then transfer it to a spice jar or airtight bag. Use it in any recipe calling for orange peels.

But I wasn't finished yet. I have used lemon peels with vanilla extract in boiling water for years to give my home a yummy, refreshing smell. So I tried it with orange peels.

Just place several orange peels in a saucepan with about two cups of water. Add a teaspoon or so of pure vanilla. If you have a rosemary or lavender plant, snip off a bit and add it to the water. Bring it all to a boil, then reduce the heat to low. Simmer all day to release a wonderful fragrance throughout your home. Be sure to check the water level every half hour and add more water as needed.

Here are a few other uses for orange peel:
  • Instead of rosemary and vanilla, use cinnamon and cloves during the fall and winter for the perfect autumn scent.
  • Put a piece of orange peel into your brown sugar to keep it soft.
  • Use it to scrub your sink and remove that gunk all sinks seem to accumulate over time.
  • Scatter orange peels in your garden to keep cats from using it as a litter box.
Do you know any other uses for orange peel? If so, please share them with us!


Written and submitted by Lindsey @ Penny-wise

Monday, March 14, 2011

Bread Dough Enhancer

Ingredients:

4 cups powdered milk
3/4 cup lecithin granules
3 heaping Tbsp. Vitamin C powder
2 Tbsp. ground ginger
3 Tbsp. cornstarch

Combine well and store in an airtight container. For each loaf of
bread, add 2 tsp of enhancer to dough with flour (1/4 cup for 6-loaf
bread recipe).

An alternative to lighten up your loaves is to add 2 eggs and 2 Tbsp.
vinegar for every 4 loaves. Add it in with the water to complete the
liquid measurement as defined in the recipe.


Submitted by Gaeleen

Tuesday, March 8, 2011

The Many Uses of Borax


Not only is Borax a great laundry booster, but it is excellent for many other uses in the household.  Here are a few ideas.

1. Toilet Cleaning
Pour some borax into the toilet bowl before going to bed and then clean with a brush in the morning. You will find it an easy task as the Borax loosens the grime overnight.

2.  Economical Scouring Powder 
Mix together
1 Tbsp. Borax
1 Tbsp. Baking soda
1 Tbsp. Salt
This makes an excellent and economical scouring powder for sinks, tubs, tile, and grout. Remember that Borax is non-abrasive, so it is a wonderful cleaning agent.

3. Diapers
Rinse diapers out immediately and begin soaking in a solution of 6 Tbsp. of borax for each bucket of warm water. When you are ready to wash them, use a warm cycle and add a little amount of white vinegar in place of your usual fabric softener – this will help make the diapers soft and absorbent again.

*Don't forget about our laundry soap recipes in LIQUID and POWDER.
*And our make-it-yourself all-purpose cleaner, which uses essential oils and Borax.

Cautions:  Borax is harmful if ingested and so one should avoid using it around food. It can also irritate the skin and lungs, so use with care. Wear gloves when using and do not inhale the dust.  As with all cleaning supplies, keep out of reach of children and pets. It is always better to be safe than sorry. Borax is best used for heavy duty cleaning and is toxic in high doses so please use caution.

Saturday, March 5, 2011

Making a Proper Pot of Tea

Often it is cheaper to buy loose tea leaves than tea bags, so here is the way to make a proper pot of English black tea.
You will need the following:
Tea leaves - 1 tsp. per person plus 1 tsp. for the pot
Boiling water
Sugar to taste
Milk or lemon to taste.

1. Fill your kettle with fresh cold water and bring it to the boil.
2. Meanwhile, swish hot water around in the teapot (preferably china or earthenware). This is an important step as it helps the water remain at the boiling point when it is poured in the pot.
3. Just before the kettle boils, empty the water out of the teapot and put in the tea leaves. Take the teapot to the kettle and fill it with the freshly boiled water.
4. Stir the tea briefly, then put the lid on the pot and leave the tea to brew for 3-6 minutes, depending on how strong you like it. Remember larger leaf teas take longer to brew. You may use a tea cosy to keep the pot warm if you have one.
5. Pour the tea through a strainer into the cup, and then add milk, sugar or lemon.
6. After about 15 minutes the tea will start to stew in the pot and have a nasty bitter taste and so it is better to make a fresh pot at that time.
7. Have some slices of lemon ready for those who would prefer their tea weaker and without milk.
Serve with your favorite tea party fare, little sandwiches and cakes and whatever other things you enjoy. When my daughters were very young they used to share teatime with us, and to accomodate them we made the tea very weak and added a lot of milk. They used to enjoy the ceremony of afternoon tea very much and still enjoy tea today.
Written & submitted by Linda @ Penny-wise 

Thursday, March 3, 2011

Hot Chocolate...Before it's too late!

I don't know what the weather's been like in your neck of the woods (or desert or island or wherever you're joining us from), but it's been unseasonably warm where we live. Before we start craving freshly squeezed lemonade and popsicles, I wanted to get this recipe for hot chocolate in. This is Linda's favorite hot drink for chilly evenings when she's wanting a treat. She says, "Use the best dark chocolate you can afford."


Ingredients:


1 oz. (25 gm) dark chocolate broken into pieces
A pinch of grated nutmeg
7 fl oz (200 ml) milk
Sugar to taste,
1 Tbsp. heavy cream, whipped
grated chocolate and cinnamon
To Make:
1. Place the chocolate, nutmeg, milk and sugar to taste in a saucepan. Heat gently and stir until the chocolate melts. Do not boil.
2. Serve with whipped cream and the grated chocolate on top. Enjoy!
Submitted by Linda @ Penny-wise

Tuesday, March 1, 2011

G-free, Grain-Free Muffins

Ingredients:
1/2 cup corn flour
1/2 cup rice flour
1 Tbsp. cornmeal
3 Tbsp. baking powder
1/2 tsp salt
1/4 cup margarine or butter, softened
1/3 cup sugar
2 eggs, separated
3/4 cup skim milk
1 tsp. vanilla

Sift together flours, cornmeal, baking powder, and salt three times. Set aside.  
Cream margarine or butter, then add sugar and vanilla. Cream again. Beat egg yolks and blend into creamed mixture. Mix well. Mix in flour mixture alternately with milk, beating until smooth each time. Fold in well beaten egg whites. Spoon into greased or lined muffin pans to 2/3 full. Sprinkle with streusel. Bake at 325 degrees for 30 minutes.

Streusel:1/2 cup chopped nuts
1 tsp. cinnamon
1 Tbsp. rice, potato or corn flour
1 Tbsp. margarine, softened
1/4 cup brown sugar

Mix until crumbly.


Dairy-free Adaptations:
Replace butter or margarine with Earth's Balance.
Replace milk with rice or almond milk.

Submitted by Gaeleen